As an Amazon Associate, we earn from qualifying purchases. Some links on this site are affiliate links at no extra cost to you. Our recommendations are based on thorough research and editorial judgment.
How to Fix the Most Common Soy Wax Problems (With Solutions)
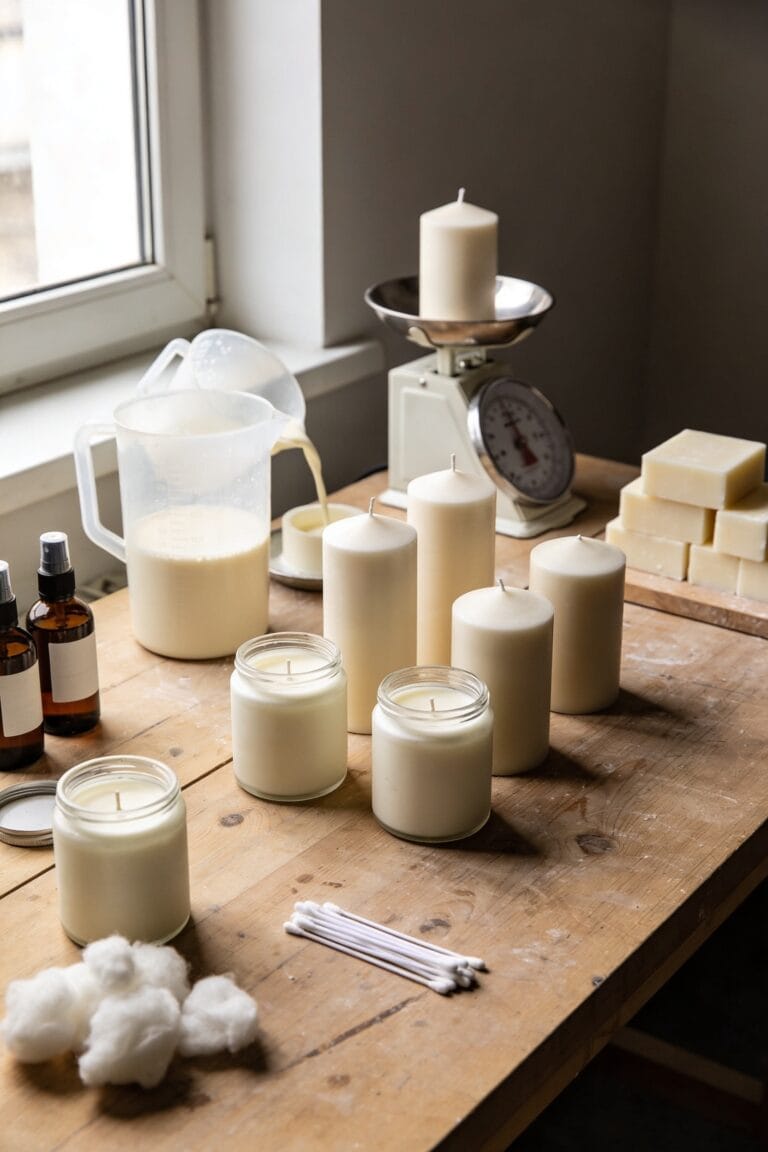
All right, here’s the thing: most soy wax disasters—frosting, sinkholes, wet spots, weak scent—trace back to three culprits: temperature mismanagement, fragrance incompatibility, and wick sizing. Lower your pour temperature to 110–130°F for even cooling, add fragrance at 175–185°F for proper integration, and right-size your wick so the melt pool reaches container walls within two hours. A heat gun fixes frosting; strategic repouring fills sinkholes; stable storage stops sweating. Each problem’s got a straightforward fix, and I’ve learned them all the hard way.
Key Takeaways
- Use a heat gun to smooth frosted surfaces by melting and reflowing the wax crystalline coating evenly.
- Pour soy wax at 110°F–130°F in rooms above 70°F to prevent cracking and promote slow cooling.
- Fill sinkholes by reheating trapped air immediately after pouring, then repour reserved wax into depressions.
- Select proper wick size for your container shape and trim to 1/4 inch for even melt pools.
- Add fragrance oil at 175°F–185°F at 6%–10% load to prevent sweating, wet spots, and scent issues.
Prevent Soy Wax Frosting With Lower Pour Temperatures
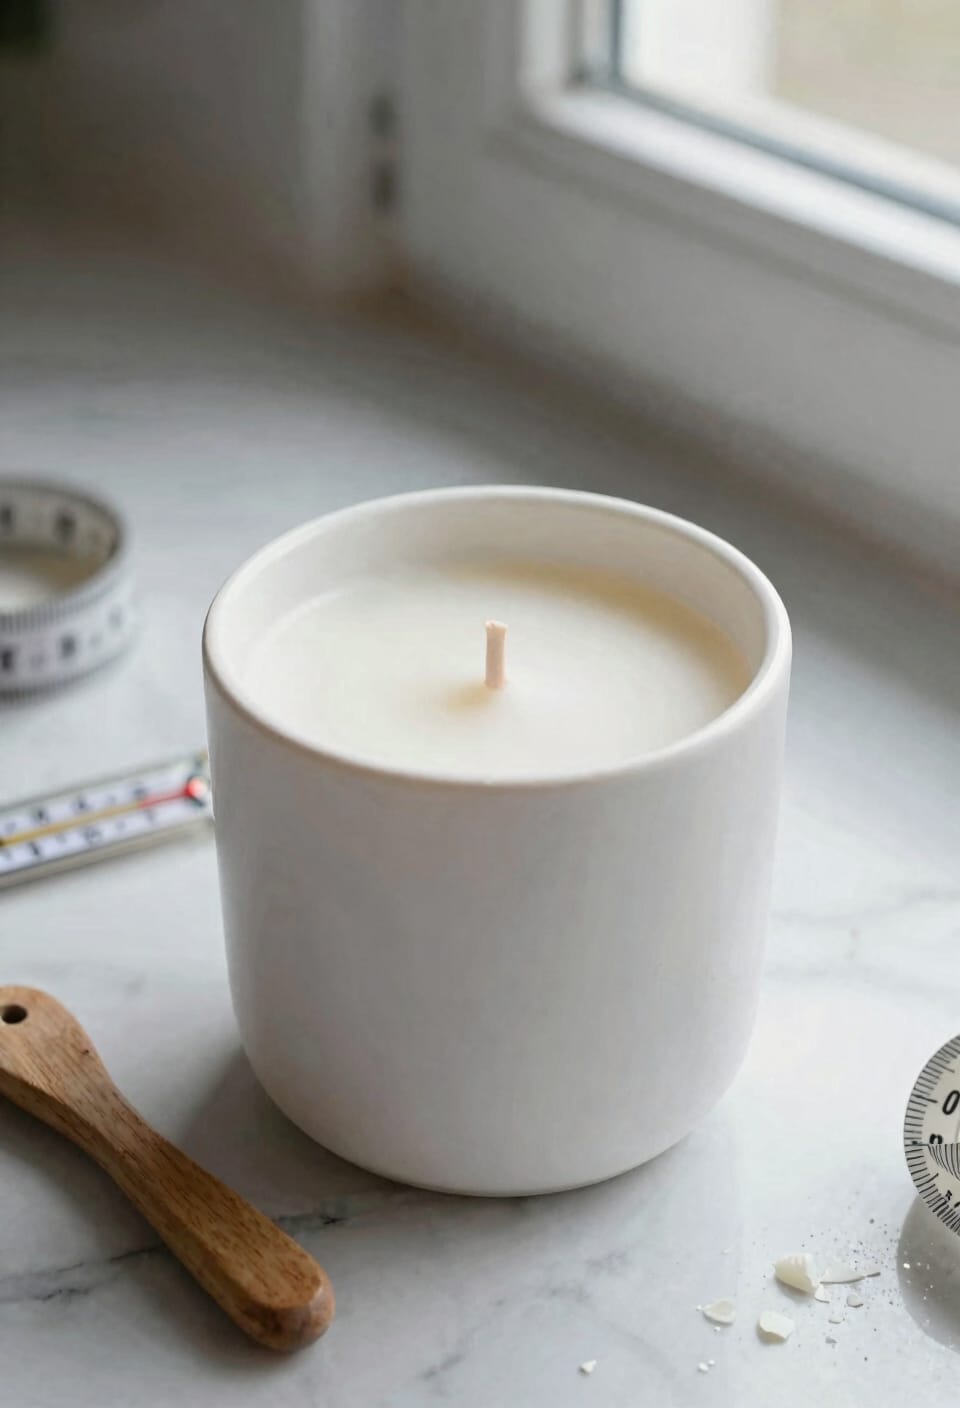
Why does your beautiful colored soy candle look like it’s been dusted with powdered sugar? That’s frosting—a white crystalline coating that forms naturally during cooling and curing. I’ve watched it happen countless times, especially on darker shades where it’s most noticeable.
Here’s the thing: lower pour temperatures solve this. I’m talking 110°F to 130°F instead of pouring hotter. When you pour cooler wax, slow cooling happens naturally, giving those soy crystals time to settle without creating that frosted appearance.
After pouring, grab a heat gun and smooth the surface gently. If frosting still appears, consider blending in beeswax or coconut wax additives—they interrupt the crystal structure. It takes patience, but you’ll get those clean, glossy finishes you’re after.
Recommended Products

Fast Melt 60 Candles for You: Achieving a rush order for a bulk order was made easy. TOAUTO 30Lbs wax melter can melt 30Lbs of candle wax and make 60 8-ounce candles at a time, greatly reducing your production time and making mass production of candles piece of cake. it's time to consider investing in a fully functional candle maker machine!

Fast Melt 80 Candles at A Time: The TOAUTO WMF-10L digital wax melter can handle a rush order for bulk candle production. It can melt 10 quarts of candle wax and create 80 4-ounce candles at a time, significantly reducing production time and making mass production easier.

Effortless Wax Draining: Bid farewell to wasted wax with our wax melter's bottom liquid outlet. This feature ensures that every last drop of wax is utilized, allowing the wax liquid to flow smoothly to completion. Say goodbye to the frustration of leftover wax residue and hello to uninterrupted crafting sessions.
Eliminate Cracking With Temperature Control
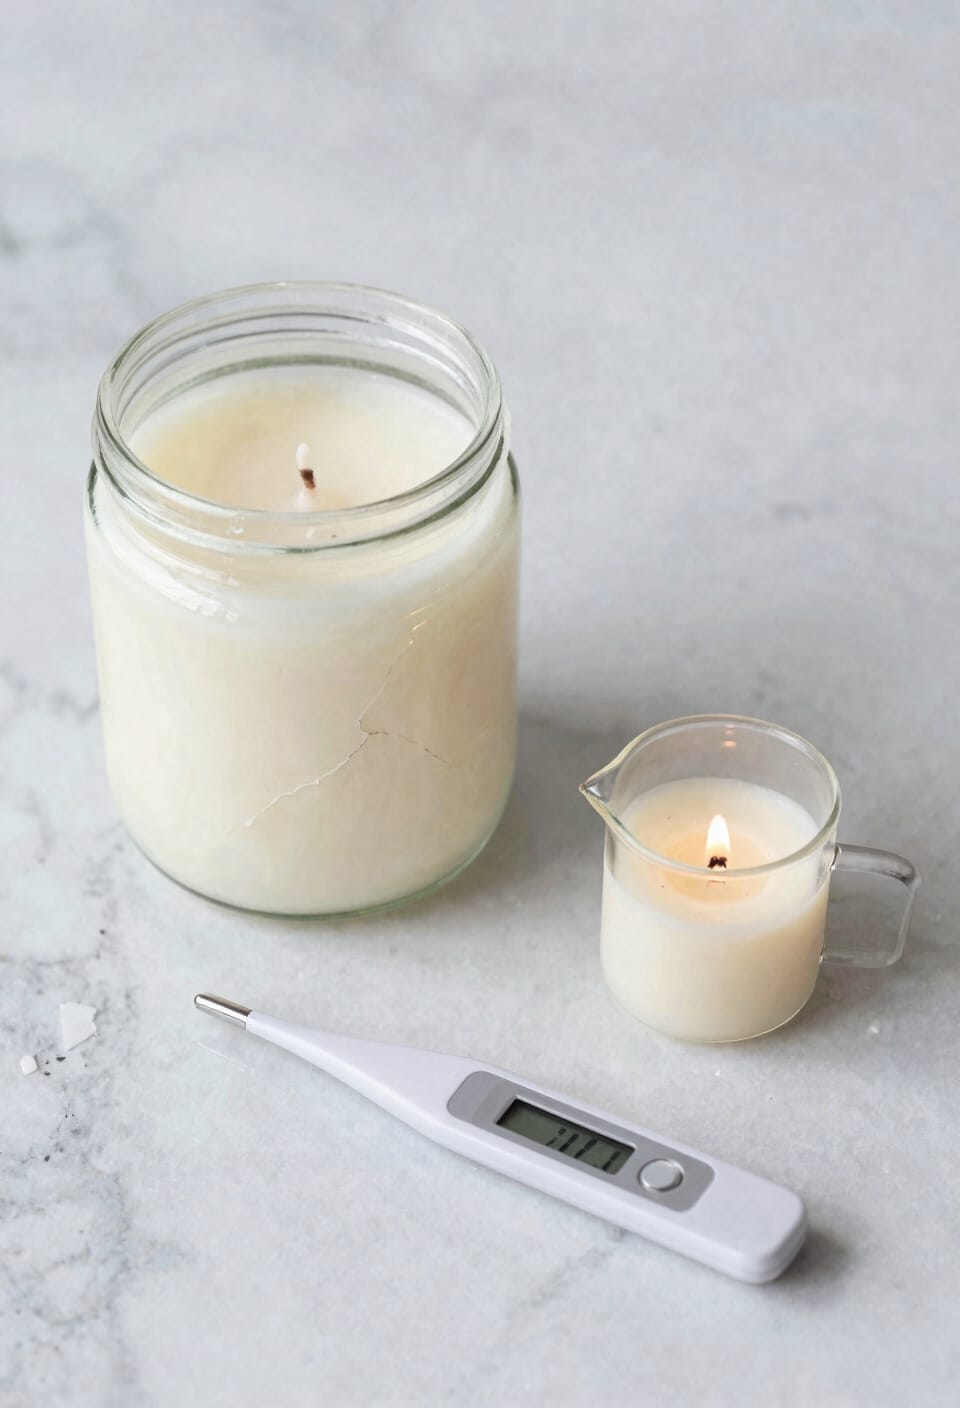
If you’ve ever pulled a candle from the mold only to find it covered in thin or thick cracks—especially radiating from the wick or creeping along the edges—you’ve met cracking, and it’s almost always a temperature problem. Here’s the thing: rapid cooling or drastic temperature drops cause wax to contract unevenly, and that stress shows up as fractures across your surface.
I’ve learned this the hard way. Pour in rooms above 70°F and keep fans away from your cooling candles—slow cooling is your friend. Reduce your pour temperature incrementally and make certain even wick placement to minimize stress points. If cracks already exist, melt additional wax into them using a heat gun or hairdryer. Patience during cooling prevents most problems entirely.
Recommended Products

#1 Portable Solar Oven from Salt Lake City to the Solomon Islands! Cook from sun-up to sundown.

✔UPGRADE CADNLE CRAFT, BOLDER CREATIONS: With Leerie D6 digital wax melter, you're not just upgrading your equipment—you're upgrading your entire crafting experience. With the 12 lbs capacity to melt up to 48 4oz candles at a glance, without the constant need for refills or multiple melting sessions. D6 Wax Melter is your craft room's new best friend, whether you're a DIY enthusiast looking to make candles for gifts or a small-batch producer aiming to grow your business.

SOY CANDLE MAKING KIT FOR ADULTS: Includes 12 lb natural soy wax for candle making (1 bag 10lb + 4 bags, 8 oz each), 1200 mL melting pot, thermometer, 2 round and 2 square 8 oz candle tins with lids, 100 cotton candle wicks, 100 wick stickers, 2 metal wick centering tools, 4 wooden wick holders, 4 wooden stirring sticks, 4 warning labels, 1 silicone finger protector, 1 silicone trivet, 4 gift tags with 18” twine, and step-by-step instructions.
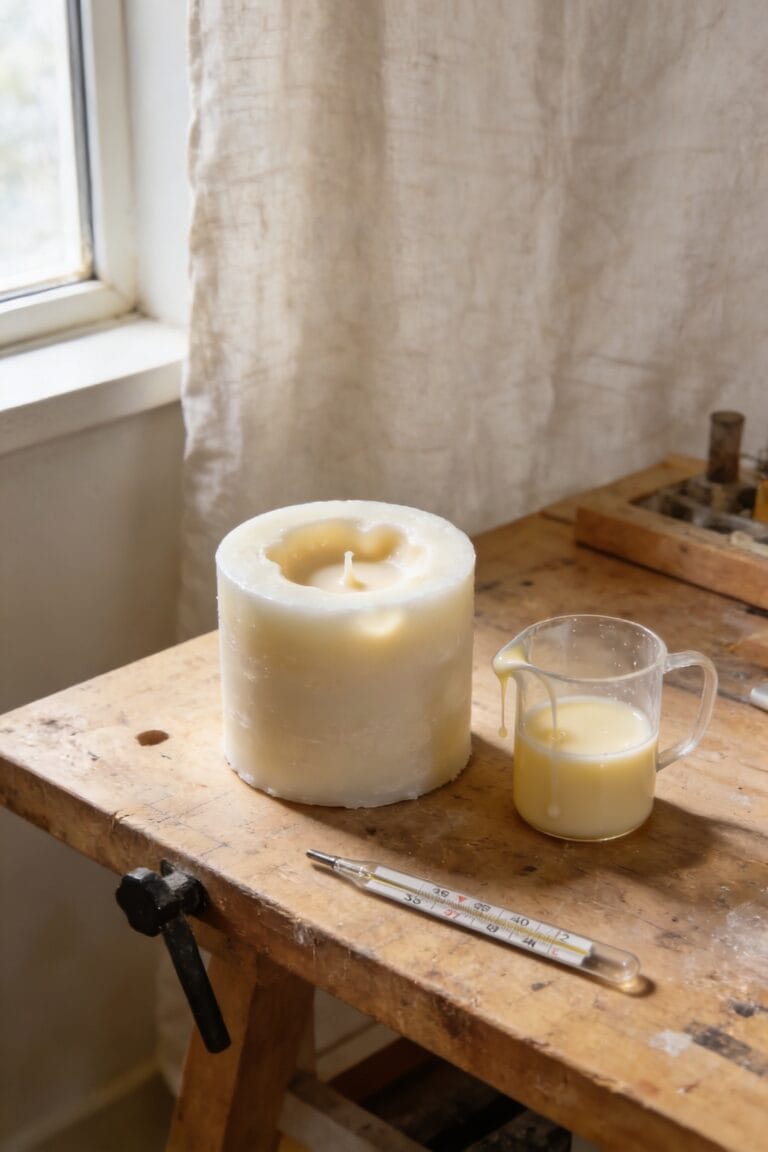
Fill Sinkholes With Strategic Repouring
Those little bowl-shaped depressions that crater around your wick—we call those sinkholes, and they’re usually the result of air pockets trapped during cooling or a pour temperature that’s simply too low to let the wax flow and settle properly.
Here’s the thing: your candle’s top dries while the bottom stays warm, creating that suck-down effect. I’ve fixed plenty by using a heat gun for targeted reheating right after pouring—it releases trapped air bubbles before they harden into permanent dimples.
Now, if sinkholes still form, reserve some leftover wax and perform a second pour once the initial layer’s set. This strategic repouring fills those gaps cleanly. You might also bump your pour temperature up incrementally next time. Small adjustments prevent big problems.
Recommended Products

THE ORIGINAL MASTER HEAT GUN SINCE 1958: Rugged, reliable, the workhorse of heat guns. Master Appliance has been designing and assembling industrial-grade heat guns in Racine, WI for over 65 years. Trusted by professionals across industrial, aerospace, automotive, and manufacturing environments worldwide.

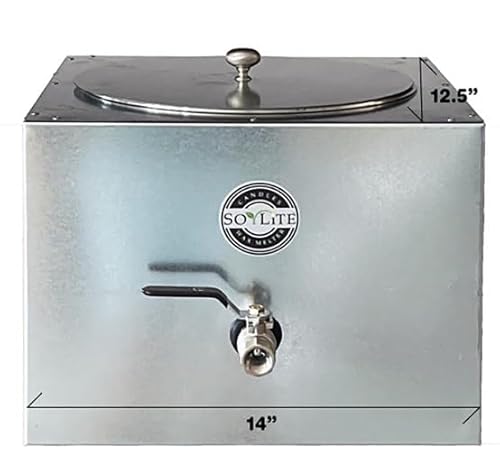
【UPGRADE VERSION】TOAUTO V3 Wax Melter with stainless steel ball valve and upgrade inner tank design -- will not freeze up with wax inside the pot, NOT CLOGGY, NO NEED HEAT GUN ANYMORE! If you have a medium consistency of candle orders, this is well worth it to make things easier.If you are thinking of starting a small candle business this is ideal.

Complete Candle-Making Toolkit at Your Fingertips:From precision tools like the digital scale to pro tools like the wick trimmer and heat gun, this all-in-one kit covers every step of the process. Whether you’re fixing imperfections, trimming wicks for a clean burn, or measuring out the perfect fragrance ratio, this kit simplifies even the most detailed aspects of candle making.
Stop Wet Spots and Sweating Before They Start

Wet spots and sweating—those little beads or oily pools that bubble up on your candle’s surface—tend to creep in when your fragrance oil isn’t playing nice with the wax, or when temperature swings make the wax contract and pull away from the glass. Now, here’s what I’ve learned: fragrance compatibility matters hugely. Not every oil plays well with soy wax, so test your fragrances beforehand. When you do spot those beads, hit them with a heat gun to liquefy the surface until they disappear. Beyond that, pay attention to storage temperature—keep finished candles away from warm conditions that encourage sweating. Stable, cool environments prevent most issues before they start.
Recommended Products

【Heating Core Spout Technology】SAY NO TO clogged! The patented spout tech keeps wax heating and running internally. The nozzle is located lower than the bottom of the internal container allowing the wax to flow emptying and faster pouring easily. Great for a clean pour! Built for candles, soap making, ideal for DIY hobbies, small-medium size candle business.
【CANDLE MAKING - 12Lbs Wax Melting Pot】You looking to unleash your creativity in the world of candle making? TOAUTO 6L digital wax melter is here to revolutionize your craft.Wax melter can hold up to 6Lbs or 12Lbs of melted wax, allowing you to make up to 48 4oz candles at a time; Your secret weapon candle wax melter making,can make soap/hair care products/cream/cosmetics.Say goodbye to the hassle of small batches and enjoy a seamless and enjoyable candle making process.
LCD display of DEWALT heat gun allows user to adjust temperature within 50-degree increments
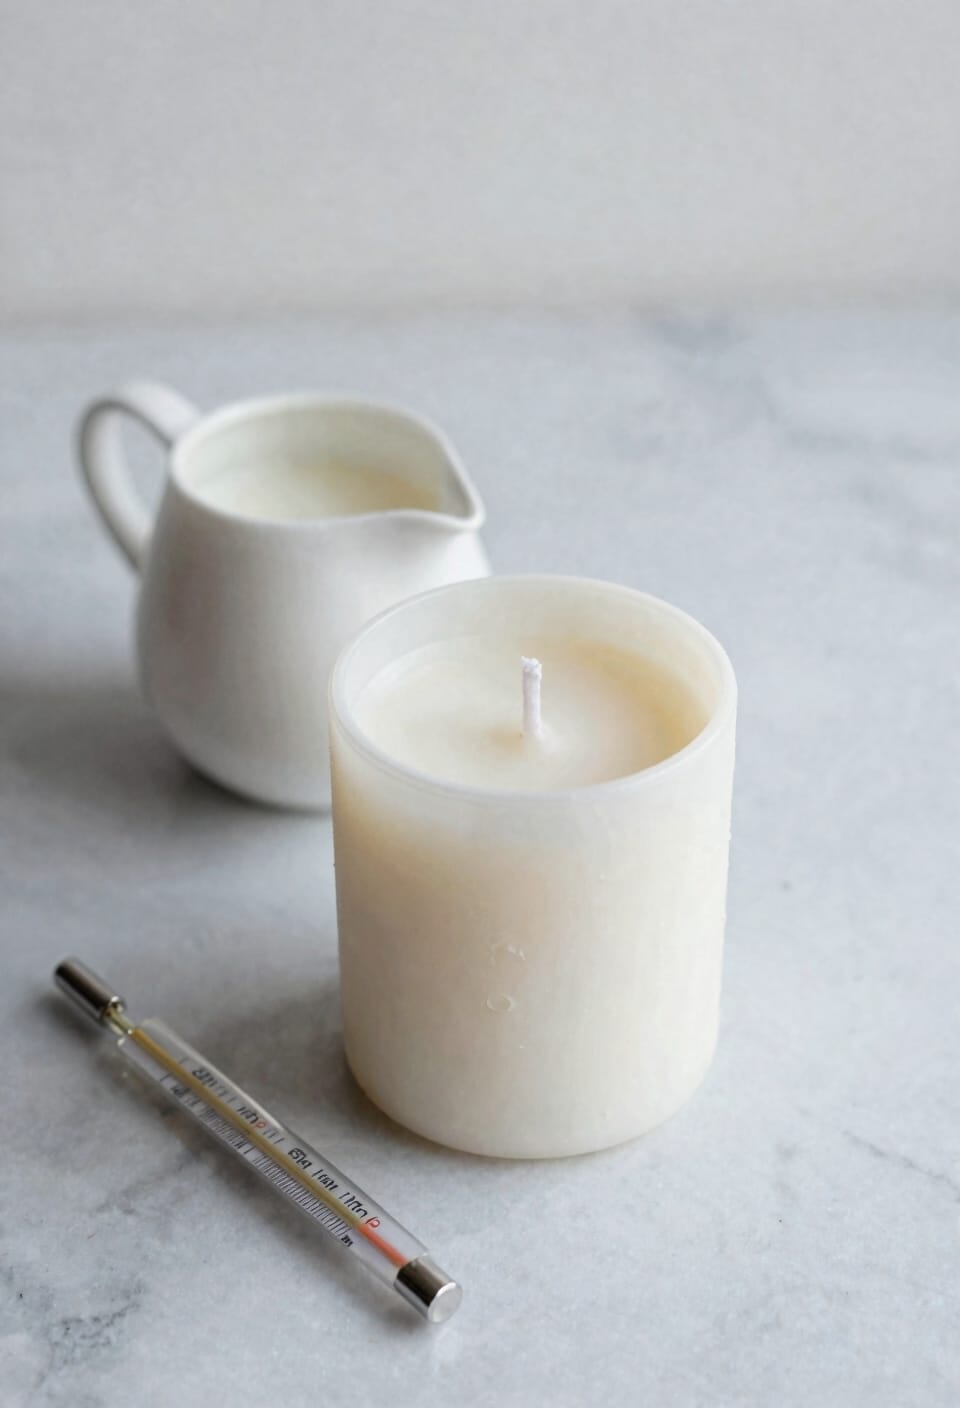
Achieve a Full Melt Pool Every Time
A full melt pool means the wax melts completely across the surface when lit, which prevents tunneling and guarantees even fragrance release. Here’s the thing: three main culprits sabotage this. First, wick sizing—pick one too small and it won’t generate enough heat; too large and you’ll get flooding. Second, your container shape matters; narrow vessels need different wick gauges than wide ones. Third, excessive fragrance load (that’s how much scent oil you add, typically 6–10%) can actually choke the flame.
Start by confirming your wick matches your container diameter. Trim it to ¼ inch before lighting. Keep fragrance within recommended percentages.
Boost Scent Throw With Proper Fragrance Technique
Maximizing scent throw—that’s how strong your candle smells both while it’s burning and sitting on a shelf—comes down to three things: fragrance load (the percentage of scent oil you mix into your wax, typically 6–10% by weight), when you add that oil, and which wax you’re working with. Add fragrance at 175°F–185°F for ideal wax emulsification, meaning the oil fully integrates into the melted wax. Stir gently to avoid incorporating air bubbles. Fragrance timing matters because adding oil too early or too late prevents proper bonding. I’ve learned soy and coconut waxes hold scent better than paraffin. Test your oils for compatibility beforehand—some fragrances don’t play well with certain waxes, and that’ll tank your throw every time.
Recommended Products

MASSIVE 8" × 14" LUXURY CANDLE – 300 OZ OF NATURAL COCONUT SOY WAX Make a statement with this Classic Big Ass Candle—our largest candle. This luxury candle delivers bold presence, elegant style, and room-filling fragrance. Perfect as a centerpiece for living rooms, great rooms, and upscale spaces.
Profeshional wax melter for candle making, Effortlessly make large batches candles . No more messing with temperature control. This new wax melter automatically keeps wax around 180 to 190 degrees. Just simply add wax and turn on. If you are running a small business or handling a big custom order? SoyLite will help save you time.
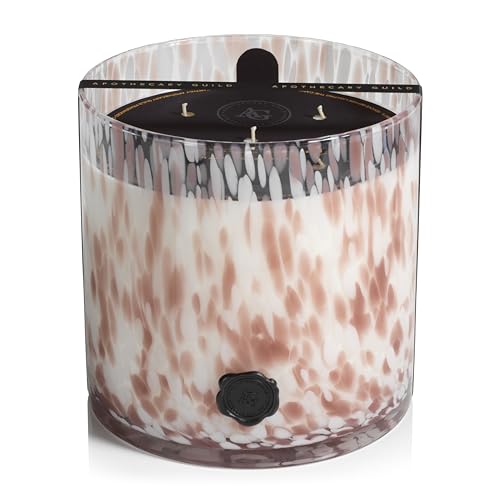
INDULGE IN LUXURY FRAGRANCE: Add sophistication to any space with the Apothecary Guild 5-wick scented candle, encased in a stunning blue tortoise-patterned glass jar. With a signature seal stamp and 150 hours of burn time, it’s the perfect way to infuse your home with elegance and warmth.
Diagnose Problems With a Quick Symptom Checklist
When something goes wrong with your candles, the symptoms’ll point you straight to the culprit. I’ve learned this the hard way after countless batches. Start with visual inspection—look at the surface closely. Are there cracks, frosting, sinkholes, or wet spots? Each one tells a story. Then do wick testing by lighting your candle and observing the melt pool. Does it reach the edges? Is the flame too tall or drowning? A proper melt pool should extend nearly to the container walls within two hours. Notice whether scent throw feels weak when you light it. These quick checks help you narrow down whether your problem stems from pour temperature, wick size, fragrance load, or cooling conditions. Diagnosis comes before the fix.
Frequently Asked Questions
Can I Use Additives Like Beeswax to Prevent Frosting on Colored Candles?
Yes, I’d recommend blending beeswax or coconut wax additives to reduce frosting on colored candles. You’ll want to test the beeswax ratio carefully and verify colorants compatibility with your additive blend for best results.
How Long Should I Wait Before Performing a Second Pour for Sinkholes?
I’d recommend waiting 24 hours before performing your second pour for sinkholes. This gives the wax time to fully cure and cool. Test the temperature with your hand first—it shouldn’t feel warm before pouring.
What Fragrance Oils Work Best With Soy Wax for Optimal Scent Retention?
I’d recommend you test oils for fragrance compatibility first—though I’m sure ancient chandlers wish they’d had this luxury. Soy and coconut waxes excel at scent diffusion when you add fragrance at 175°F–185°F.
Is Frosting a Sign That My Candle Is Defective or Unsafe?
Frosting isn’t a defect or safety concern—it’s just soy wax’s natural crystal structure during cooling. I’d say it’s purely cosmetic. The frosting causes are temperature-related, not dangerous, so your candle’s completely safe to burn.
Can I Fix Wet Spots on Already-Poured Candles Without Starting Over?
Yes, you can fix wet spots without repouring. I’ll use a heat gun to liquefy the surface, leveling it until those oil beads disappear completely. Store your candle away from warm conditions afterward.
Conclusion
I’ve thrown every curveball at you that soy wax can dish out. Here’s the thing: you’re not going to nail every pour—I still don’t—but now you’ve got the playbook. Temperature control, strategic repouring, fragrance technique—master these and you’re golden. Your candles’ll look gorgeous, smell incredible, and your friends won’t believe you made them. You’ve got this.