As an Amazon Associate, we earn from qualifying purchases. Some links on this site are affiliate links at no extra cost to you. Our recommendations are based on thorough research and editorial judgment.
How to Start Making Candles: Your First Batch, Simplified
All right, here’s what actually matters: grab a double boiler, digital scale, 8 oz heat-resistant jars, and cotton wicks. Melt soy wax to 135°F, add fragrance oil (about 1 oz per pound) at 185°F, then pour between 120–140°F. Let it cure overnight, do a second pour to smooth the top, trim your wick to a quarter-inch, and burn-test for an hour. Most failures come down to wick size or pouring temperature—nail those two and you’re golden.
Key Takeaways
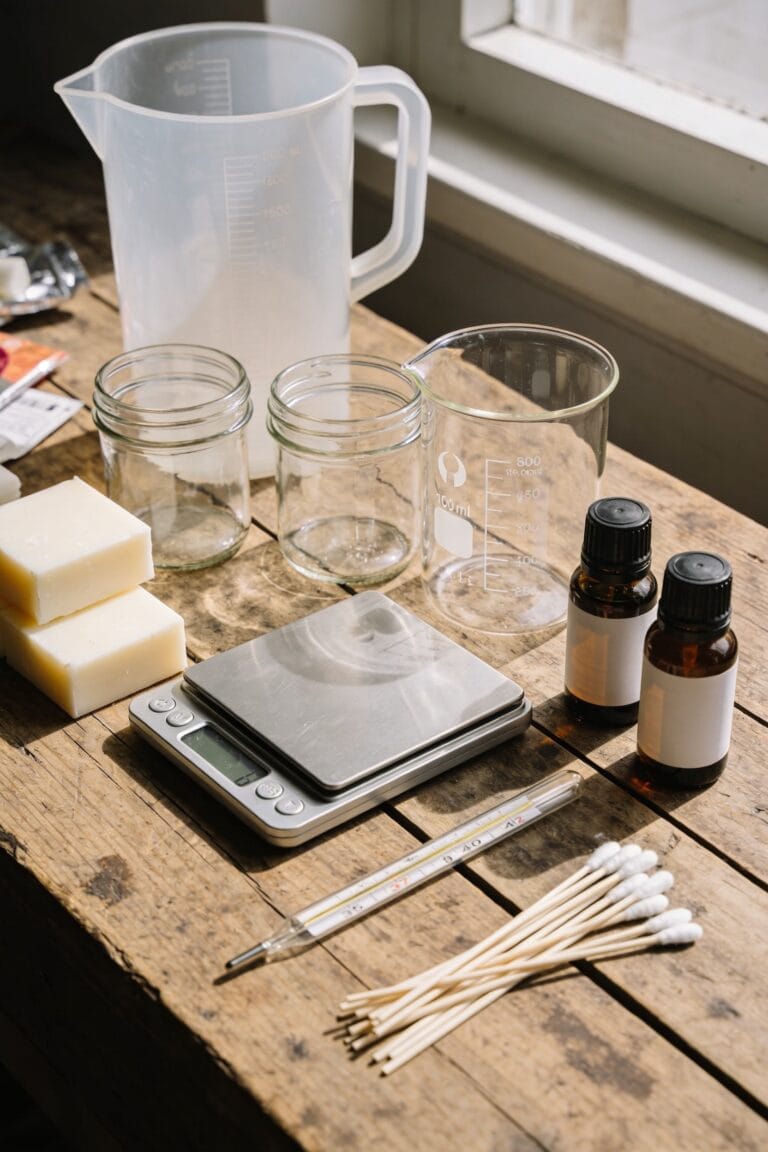
- Gather essential supplies: double boiler, digital scale, heat-resistant glass jars, cotton wicks, thermometer, and candle-specific fragrance oils.
- Select an 8 oz heat-resistant glass jar and secure a properly-sized cotton wick centered with a wick sticker.
- Melt soy wax in double boiler around 135°F, add fragrance at 185°F, then pour between 120–140°F for best results.
- Pour wax slowly to quarter-inch from rim, allow initial hardening, then perform a second pour to smooth the surface.
- Cool candles overnight undisturbed, burn test for one hour per inch of diameter, and trim wick to quarter-inch.
Gather the Essential Supplies
Before you pour a single ounce of wax, you’re going to need to gather the right tools—and I’m not going to sugarcoat it, buying the wrong stuff early on is how you end up with a pile of ruined candles and a wallet that’s lighter than it should be. Start with a double boiler setup, digital scale, and heat-resistant glass jars. You’ll need cotton wicks with wick stickers, a thermometer, and wick holders like clothespins. For ingredient sourcing, find soy wax from reputable suppliers—it’s beginner-friendly and burns clean. Grab candle-specific fragrance oils and dyes, not food coloring. Your workspace layout matters too: set up a dedicated area with towels for spills and room for jars to cool undisturbed overnight. Quality supplies prevent disaster.
Recommended Products


Safer Ambience for Everyday Moments: Our sand wax candle design with self-extinguishing sand candle wicks minimizes fire risk if tipped and prevents hot wax spills; ideal for homes with pets or kids that won’t renounce stylish décor, offered in White, Red, Nude, and Black for cozy luxury

Professional Wax Melter for Candle Making or Soap Making, Melter 3 Gallon Stainless Tank, Extra Deep for Your Larger Batches Of Candles or Soap, This Has Been Designed From Customers Requests and is Unlike Other Competitors.
Choose the Right Jar and Wick
Now that you’ve got your supplies lined up, it’s time to lock in the two decisions that’ll make or break your first batch: the jar and the wick.
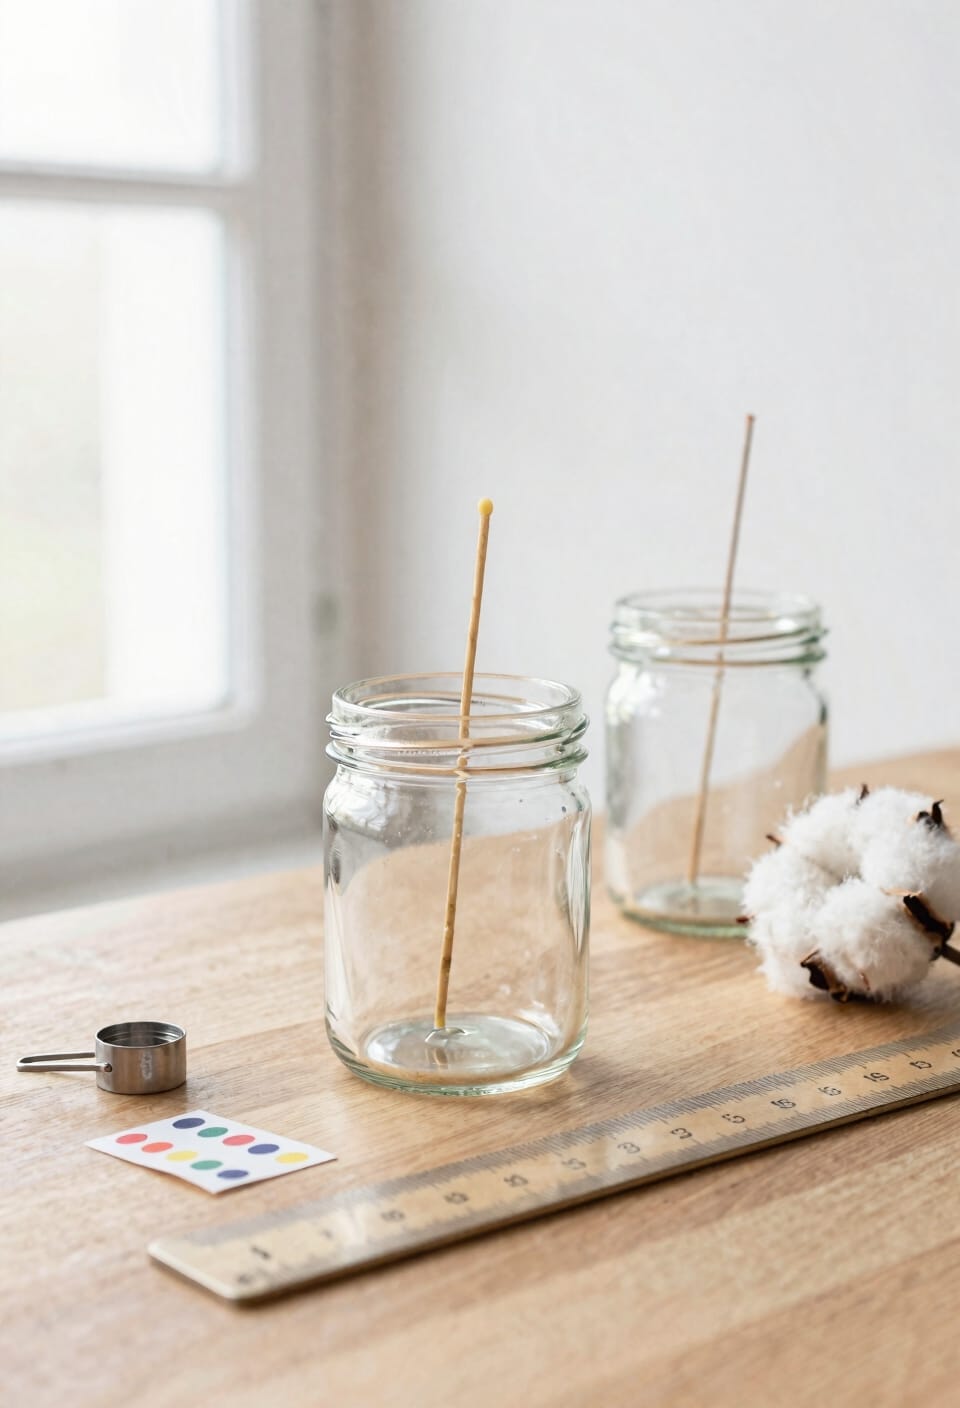
For jar materials, I’d stick with thick, heat-resistant glass—think recycled candle containers or 8 oz jars, the beginner sweet spot. Clean and dry yours thoroughly, then secure a cotton wick dead center using a wick sticker on the metal tab. Use a wick holder, clothespin, or pencil to keep it upright while pouring.
Here’s the thing: wick sizing matters more than you’d think. Wrong size, and you’ll get tunneling or excessive smoking. Get it right, and your candle burns evenly. For 8 oz containers, start with a standard cotton wick and adjust based on your first burn test.
Recommended Products

High-quality soy wax: Our handmade soy wax candles are crafted with premium-quality soy wax, ensuring a clean and eco-friendly burning experience. Soy wax is a renewable resource, free from toxins, and produces minimal soot or smoke, creating a healthier and safer environment for you and your loved ones.

LUXURIOUS FRAGRANCE: Tuberose & Jasmine features an exquisite floral blend with green notes, orange blossom, jasmine, and narcissus, evoking the traditional Andalusian courtyards at sunrise

WHAT IT IS: Our Clean-Burning Scented Soy Wax Candles Come In A Reusable Glass Vessel + Are Hand-Poured In The USA With Renewable Soy Wax + A 100% Cotton Wick.
Prep Your Containers
You’ve got your jars and wick sorted—solid choices. Now comes the unsexy part: prep work. Clean your containers thoroughly and let them dry completely. I can’t stress this enough—moisture ruins everything. Place them on a rag or towel to catch spills, then position each jar where it’ll sit undisturbed overnight. Seriously, don’t move them around.
Before pouring, think about jar aesthetics and label placement. Decide now if you’re adding labels later—this changes where your wick sits. Center your cotton wick using a wick sticker on the metal tab, then secure it upright with a wick holder, clothespin, or pencil. The wick needs to stay perfectly centered while wax cools. Get this right, and your candle burns beautifully.
Recommended Products

SOY CANDLE MAKING KIT FOR ADULTS: Make your own candles with our candle making supplies kit: natural soy wax for candle making 50 lb bag, 500 cotton candle wicks for candle making, 500 candle wick stickers for candle making, 10 wick holders.

CANDLE MAKING SUPPLY KIT: 50lbs soy wax, 500 cotton wicks, 500 glue stickers, 10 metal wick holders. Includes Everything you need to make your own candles.

All-In-One Starter Kit – Everything you need to dive into candle making! Our Hearth and Harbor soy candle wax for candle making includes 45 lbs of smooth soy wax flakes, 100 cotton wicks, 100 adhesive stickers, and 2 centering tools. Perfect for beginners or seasoned DIYers.
Melt Wax Safely With a Double Boiler
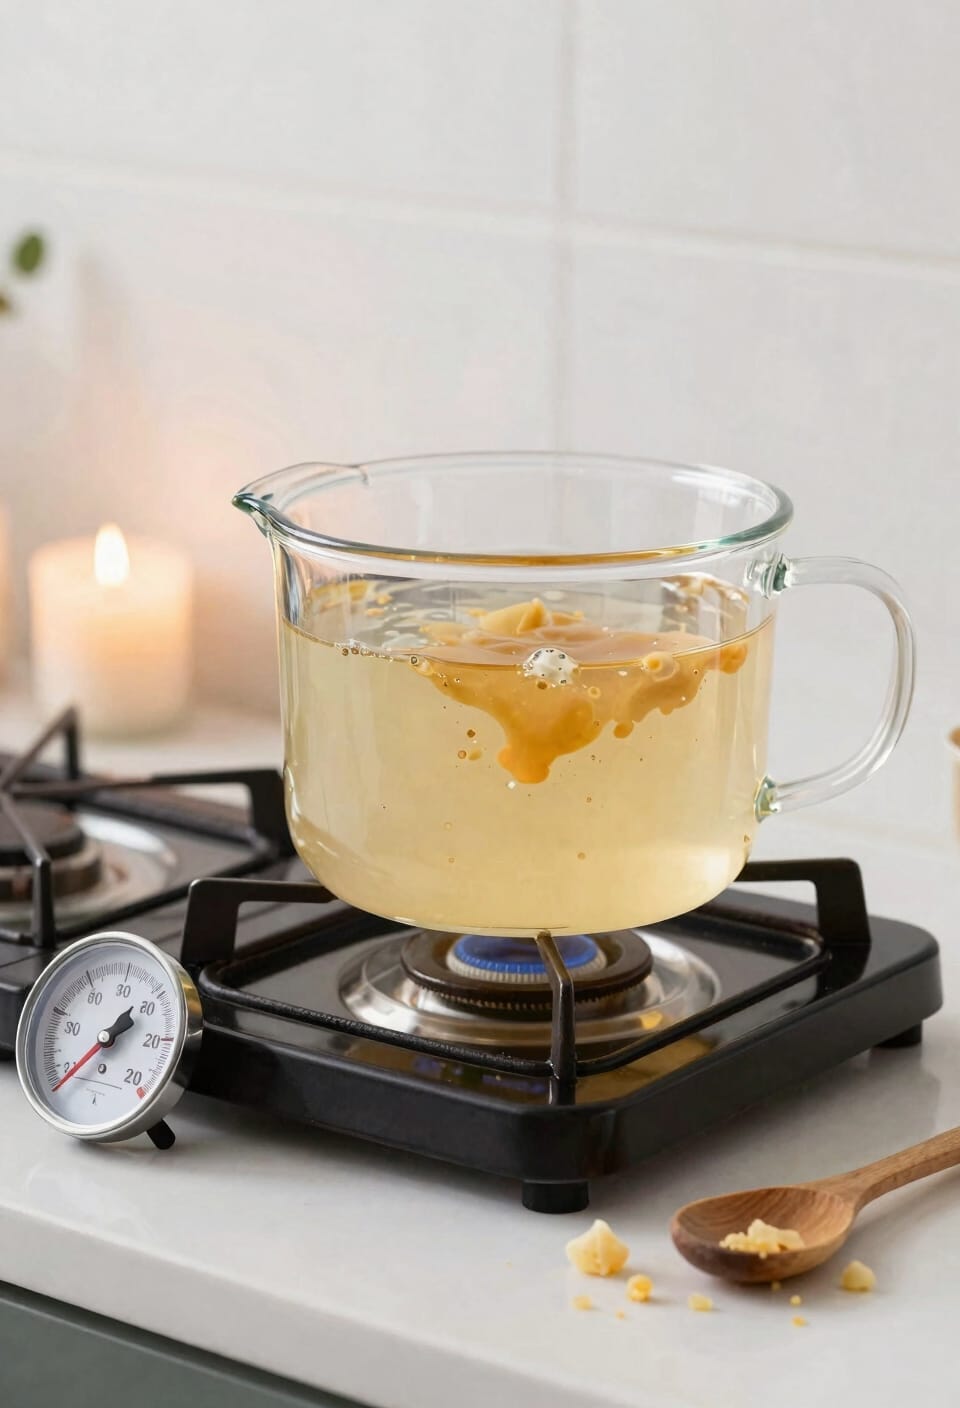
This is where most beginners either nail it or accidentally create a small wax fire in their kitchen—and I say that from experience. Here’s the thing: you’ll use a double boiler setup, which means a pot of water with your pouring pitcher nestled inside. Fill that water pot halfway—your water level matters because too little risks scorching your wax, too much can spill into it. Weigh your soy wax (1 pound’s solid for starting), place it in the pitcher, and heat on medium-high. Monitor everything with a thermometer. Your safety checklist includes never leaving melting wax unattended and keeping the heat indirect. You’re aiming for around 135°F before pouring. Get this part right, and the rest flows smoothly.
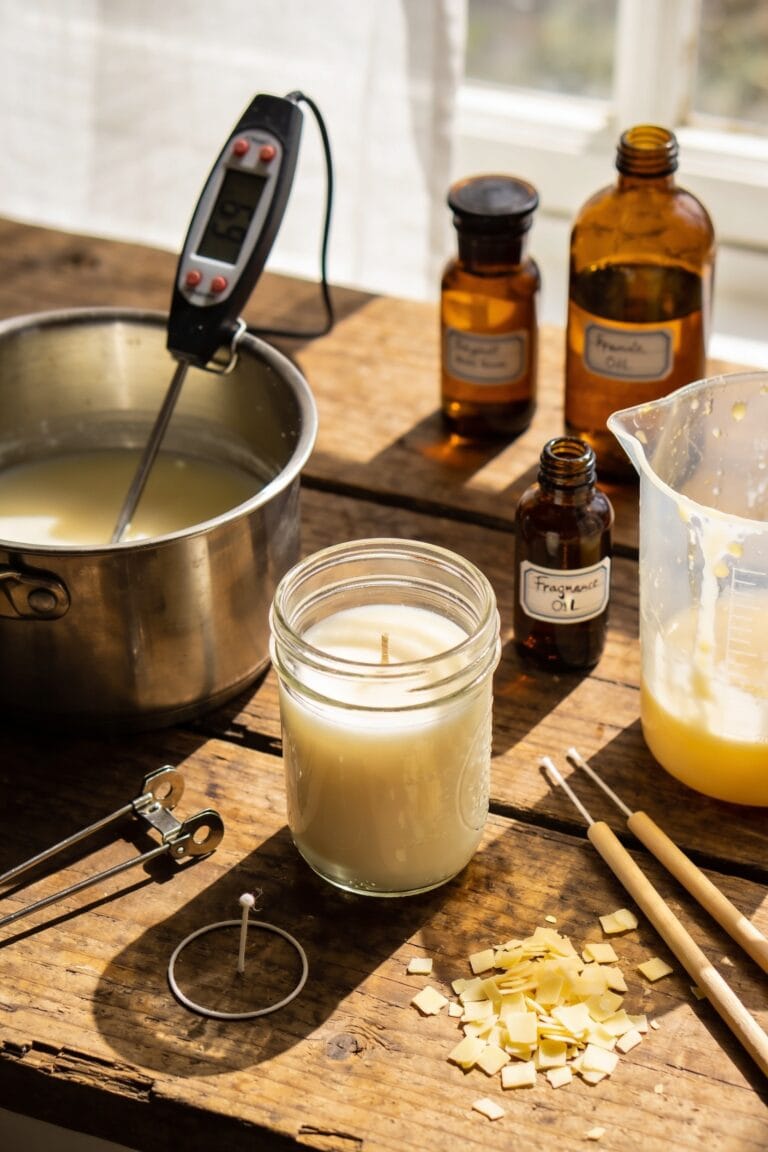
Add Scent and Color at the Right Temperature
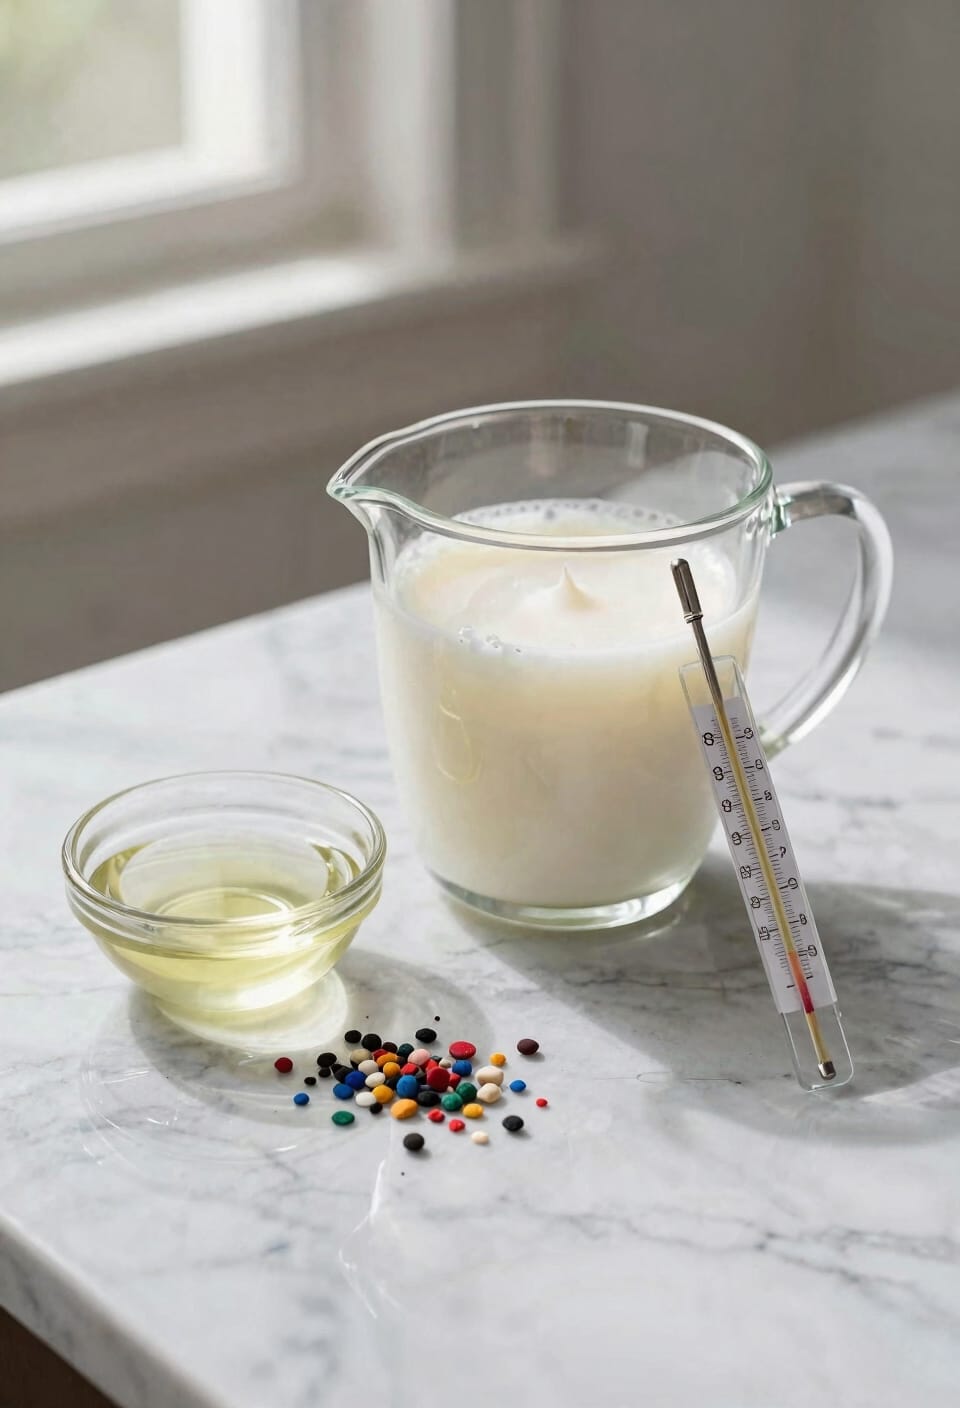
Getting the temperature right when you’re adding fragrance and dye is where a lot of first-time candle makers stumble—I’ve watched perfectly good wax turn into a weird, mottled mess because someone got impatient and dumped oils in too early. Wait until your wax hits 185°F before introducing fragrance. That temperature matters because fragrance chemistry works best then; oils bind properly to the wax molecules. Stir for one to two minutes. For color blending, add candle-specific dye after pouring instead. Food coloring and crayons won’t work—they’re water-based or incompatible. Use one ounce of fragrance per pound of wax. I know that sounds precise, but it protects your candle’s burn quality and scent throw, the strength you’ll smell when it’s lit.
Recommended Products

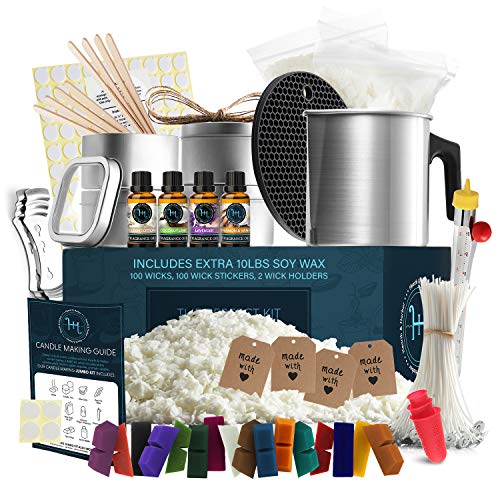
SOY CANDLE MAKING KIT FOR ADULTS: Includes 12 lb natural soy wax for candle making (1 bag 10lb + 4 bags, 8 oz each), 1200 mL melting pot, thermometer, 2 round and 2 square 8 oz candle tins with lids, 100 cotton candle wicks, 100 wick stickers, 2 metal wick centering tools, 4 wooden wick holders, 4 wooden stirring sticks, 4 warning labels, 1 silicone finger protector, 1 silicone trivet, 4 gift tags with 18” twine, and step-by-step instructions.
CANDLE MAKING STARTER KIT: Kit Inclusions: 4 8oz soy wax bags, 16 dye blocks, 4 10ml fragrance oils, melting pot, trivet mat, thermometer, 2 round and 2 square 8oz candle tins with covers, 4 cotton wicks, 4 glue dots, 4 warning labels, 4 stirring sticks, 4 bow tie clips, 3 finger protectors, and 4 pieces of kraft card with 18-inch-long string. Includes Everything you need to make your own candles.

YOUR OWN CANDLE MAKING KIT: Love crafting and DIY hobby kits? This homemade soy candle making kit is perfect for you! Enjoy beautiful, scented candles made with high-quality soy wax, fragrant scented oils, and your choice of 16 different colors! EXCLUSIVE included with our candle kit is 16 dye blocks so you can choose your favorite color or create your own customized colors. Let your creative juices flow with our best candle making kit!
Pour Your Candles
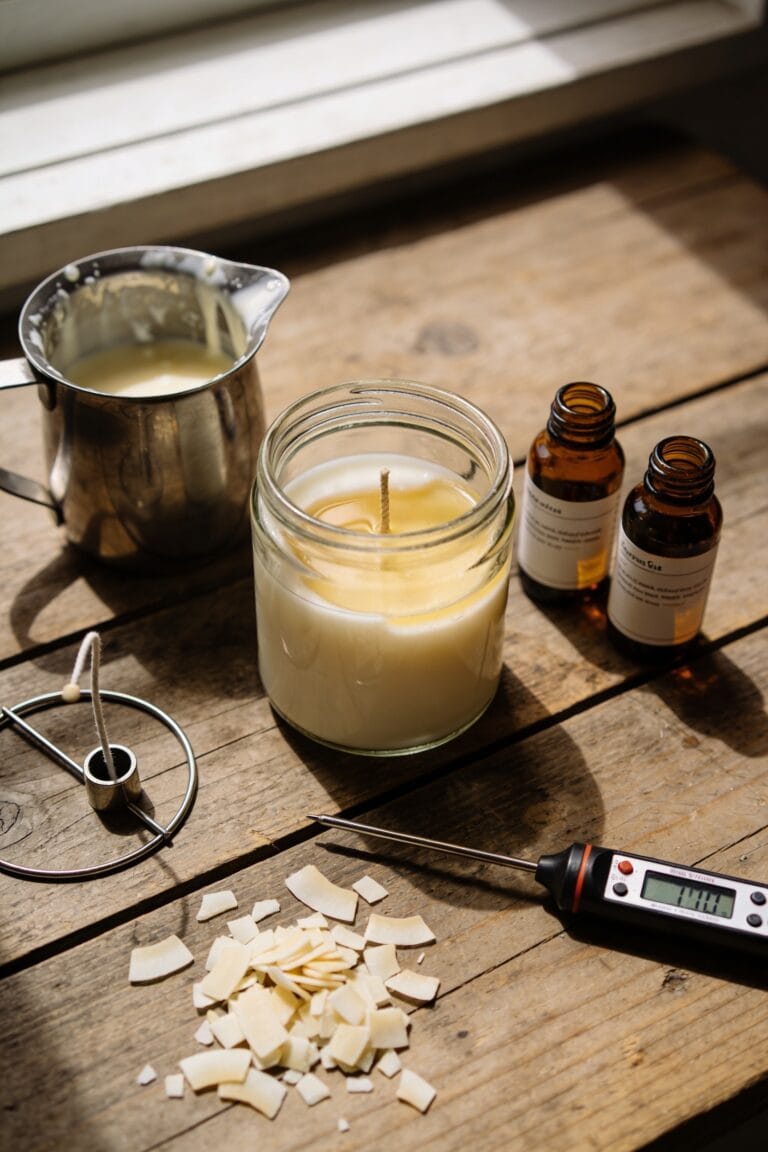
Now that your fragrance and dye are properly mixed in, it’s time to actually pour—and this is where patience becomes your best friend. Temperature control is everything here. You’ll want that wax sitting between 120-140°F when it hits the jar. Pour slowly until you’re about a quarter-inch from the rim. I know it’s tempting to rush, but a clean pour means better results. Dip your wick’s metal base in hot wax first—this helps it stick properly to the bottom. Some folks do a second pour of reheated wax later for a smooth top. Your candles’ll harden in twenty minutes to a few hours, but don’t touch them. Let them cure overnight completely before testing.
Get a Smooth Top With a Second Pour
After your candles cool for a few hours, you’ll probably notice the top’s gotten a little sunken or uneven—and that’s totally normal, but also totally fixable. Here’s the thing: a second pour fixes this. Reheat leftover wax to around 185°F, let it cool slightly to 120-140°F, then carefully pour a thin layer over the surface. This microbubble removal and surface polishing technique gives you that professional finish you’re after.
The second pour serves double duty. It smooths out imperfections while sealing any tiny air pockets trapped during your first pour. Let this layer cure completely overnight before burning. You’ll be amazed at the difference—suddenly your candles look store-bought instead of, well, homemade. It’s honestly one of my favorite beginner tricks.
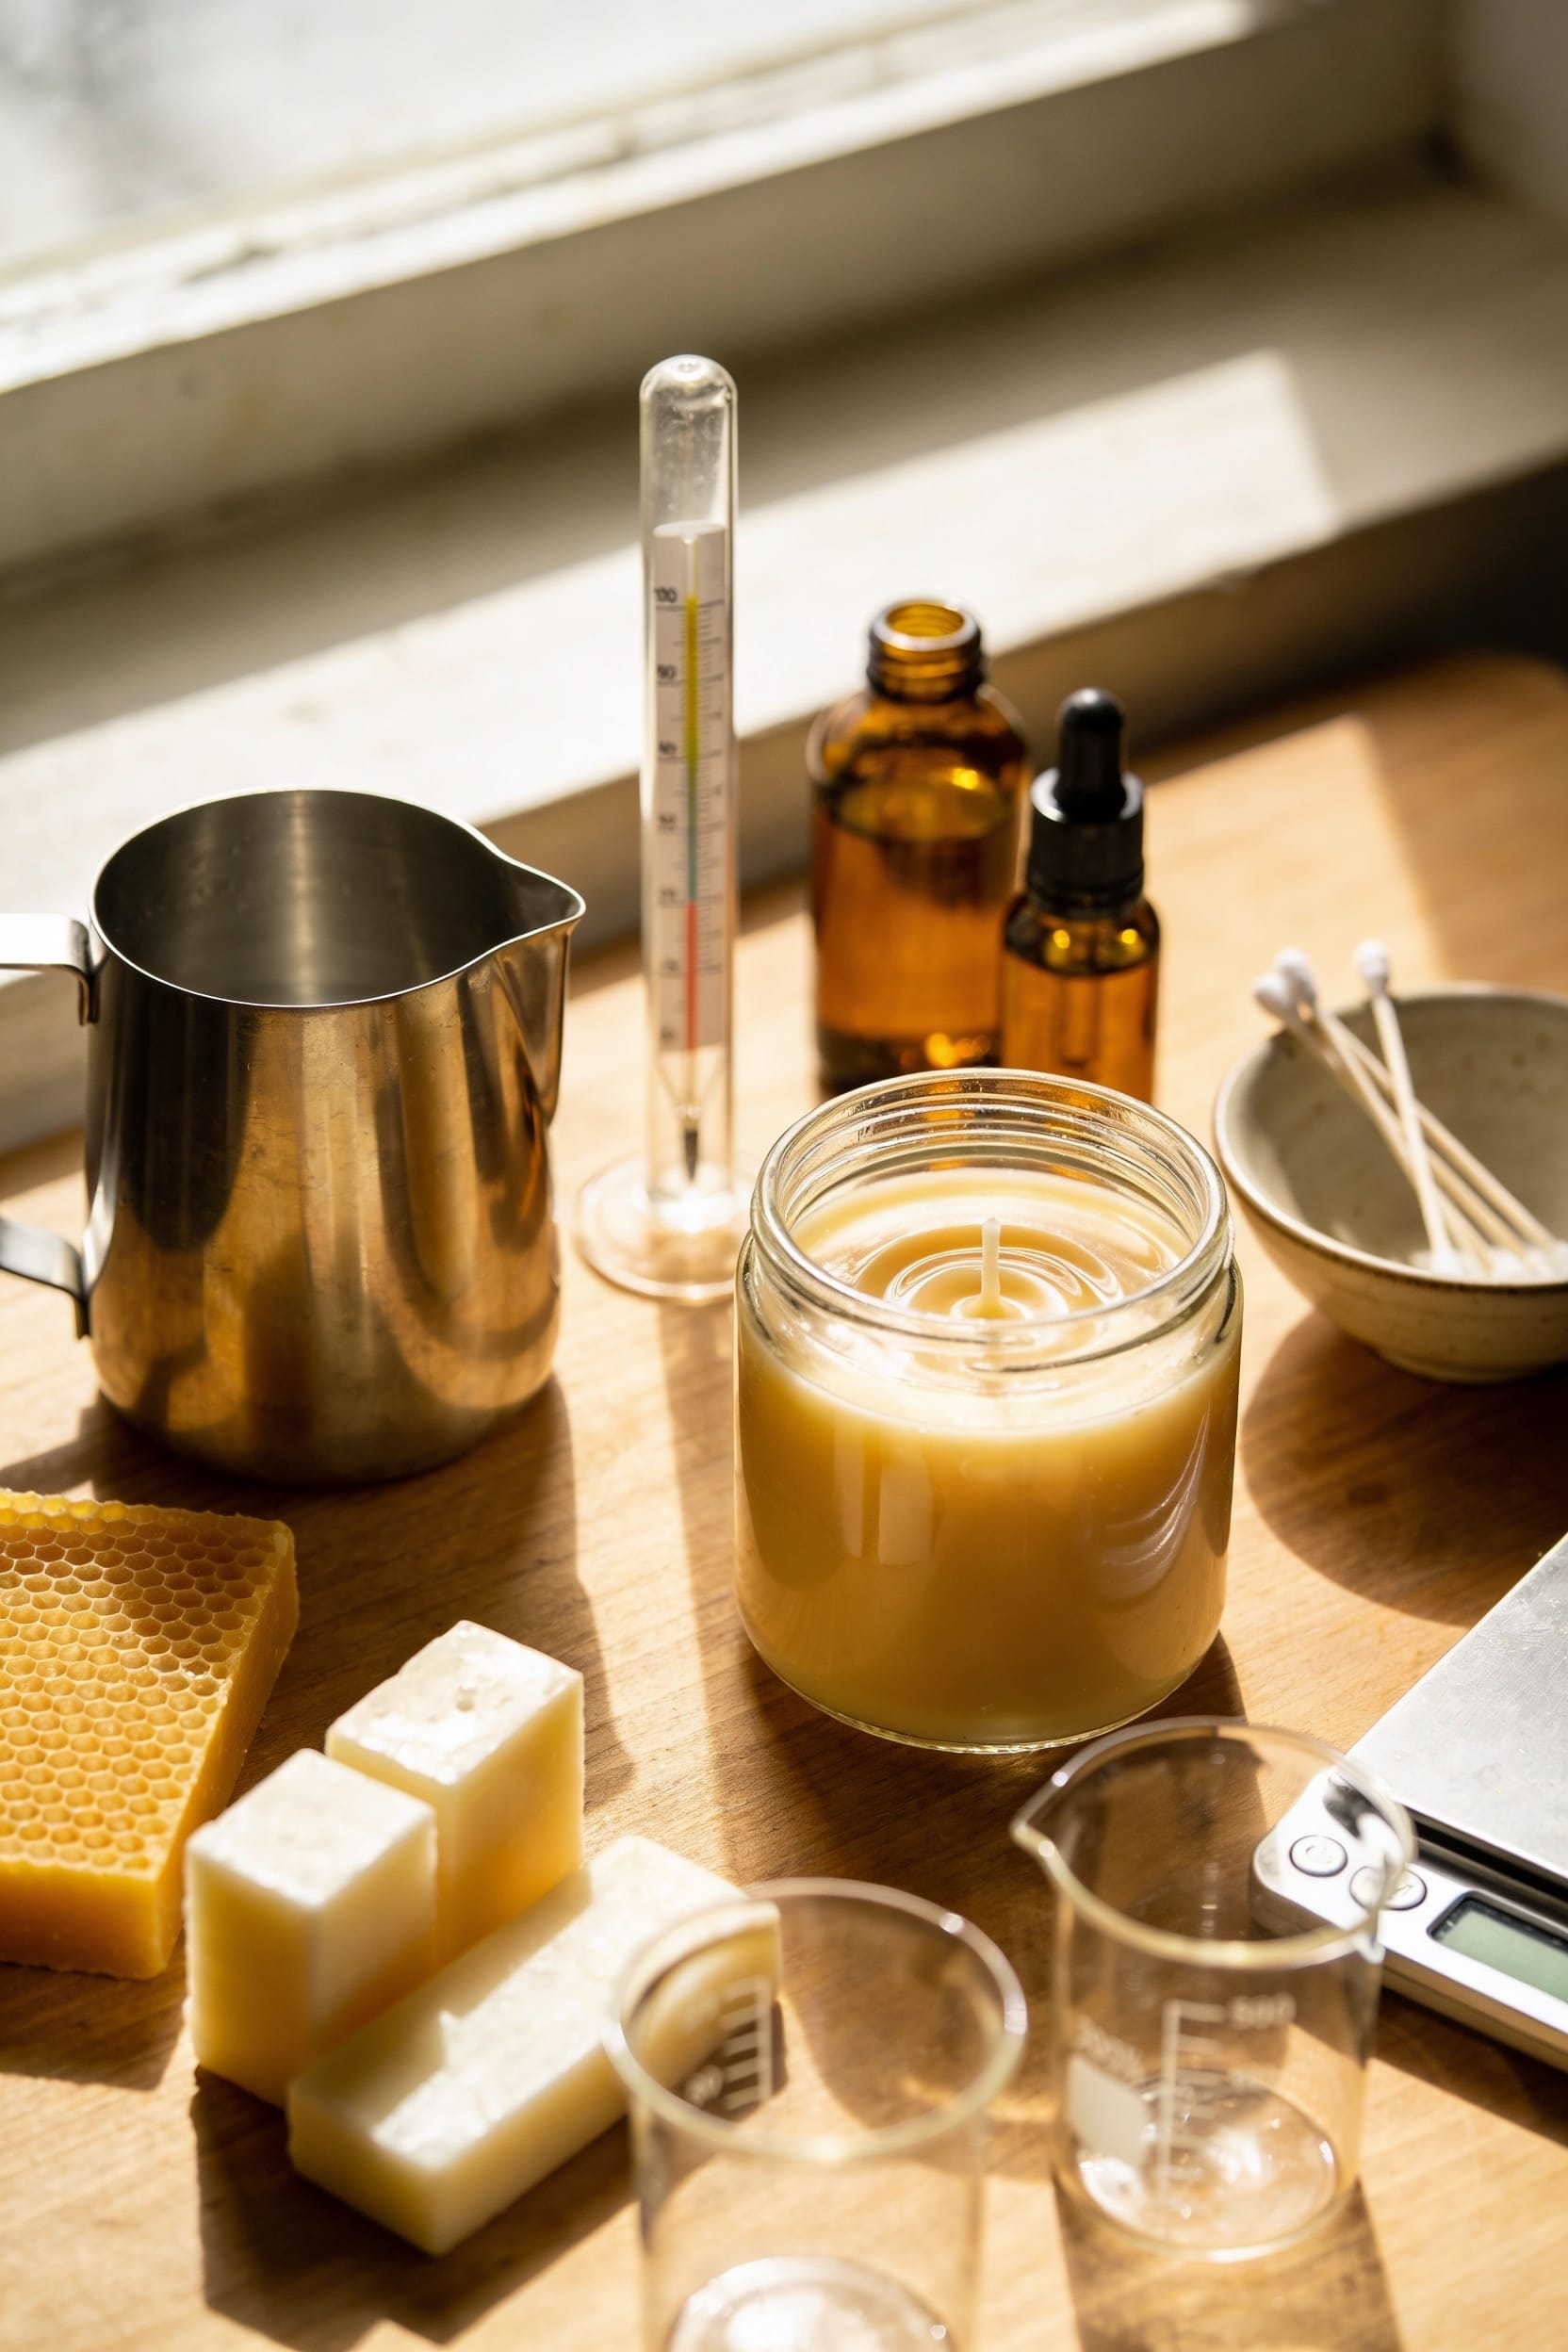
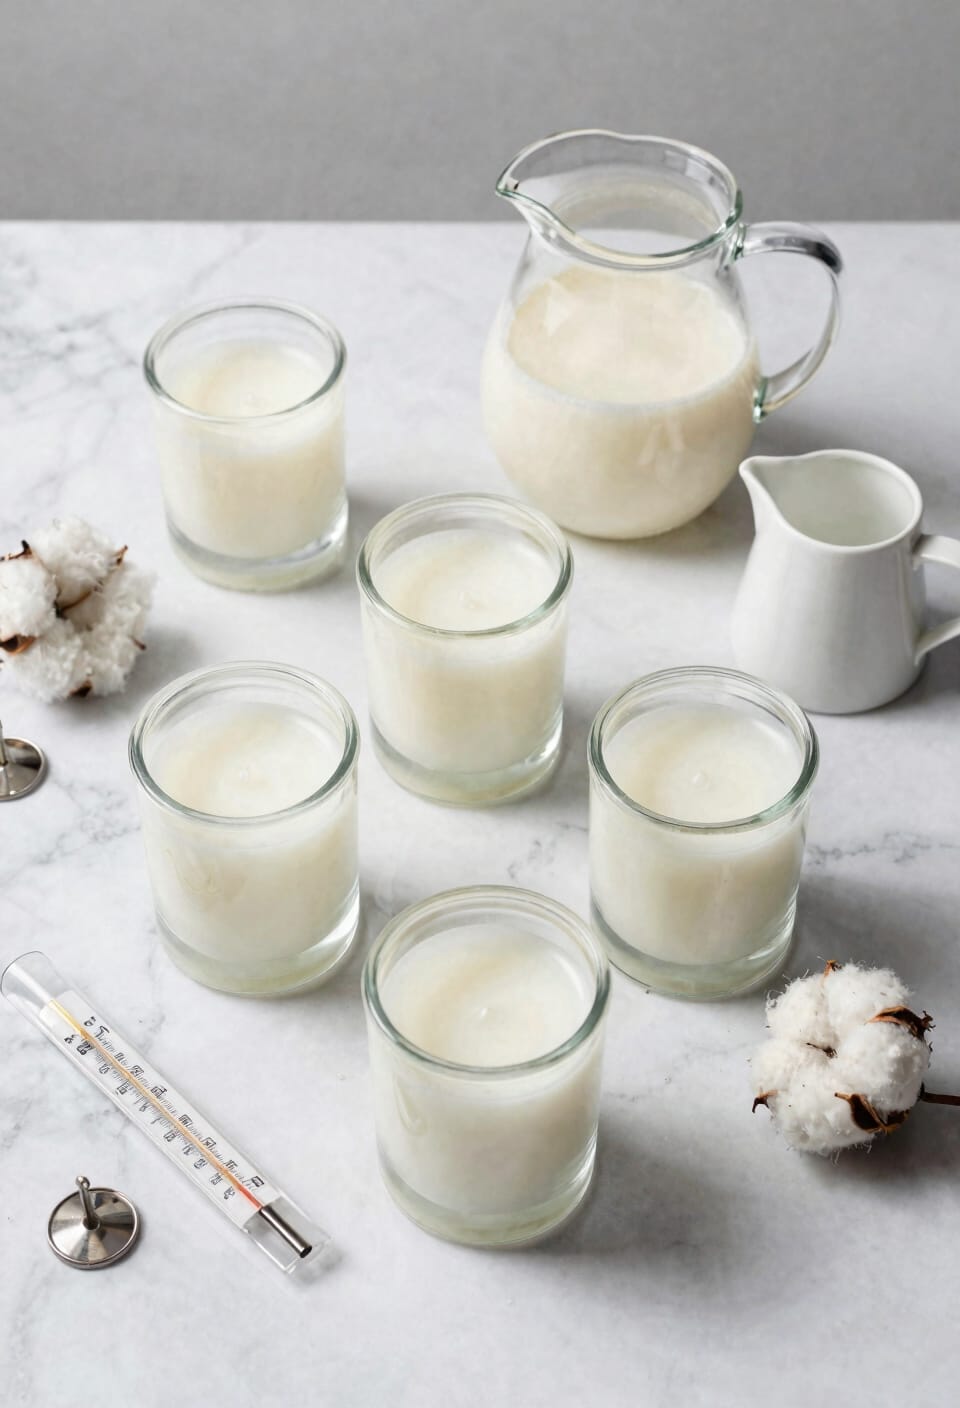
Let Your Candles Cool Overnight
Your candles need time to set properly, and rushing this step is where a lot of beginners stumble. I learned this the hard way after trying to trim wicks at the two-hour mark. Don’t do that.
Leave your candles undisturbed overnight in stable storage conditions—somewhere cool, away from drafts, direct sunlight, and temperature swings. Your cooling time depends on jar size and wax type, but overnight’s your safest bet. Soy wax especially needs that full curing period to harden completely and develop its final appearance.
Once they’re fully set, you’ll notice any sinkholes or imperfections. That’s normal with soy. Your candles are ready for burn testing tomorrow, which is where the real magic happens—and where you’ll discover if your fragrance load and wick choice actually work.
Run a Burn Test
Once your candles have fully cured overnight, it’s time to find out if they actually work—and I mean that literally. Light each candle and let it burn for one hour per inch of diameter. You’re watching for a few critical things: Does the wax pool evenly across the top? Is the scent throw—how much fragrance fills your room—strong enough without being overwhelming? Check that there’s no excess smoking or mushrooming on the wick. This burn test reveals whether your fragrance load, wick choice, and wax type work together. You might discover scent fatigue, where the fragrance seems to fade as you burn it, or that your candle lifespan feels too short. Test every new combination before scaling up production.
Fix Common Candle Problems
Even the best burn test can’t predict every problem that’ll show up once you’re making candles regularly—I’ve watched perfectly poured 8 oz jars develop sinkholes the size of quarters, seen fragrance oils separate and pool at the bottom, and had wicks that looked centered suddenly start leaning like the Tower of Pisa halfway through a burn.
Look, most issues trace back to three culprits: wick size, fragrance load (that’s the percentage of scent oil you’re adding), and pouring temperature. Tunneling fixes—where wax burns down the middle leaving walls untouched—usually mean your wick’s too small. Size up. For wick trimming, keep it to quarter-inch to prevent smoking. If fragrance’s pooling, you’ve probably overloaded it. Dial back to 1 oz per pound and retest.
Recommended Products

LIGHTEST TAPE TECH BAZOOKA EVER - 5.65 lbs. is 20% lighter than standard tapers, reducing fatigue and allowing you to work longer and faster.

TapeTech 07TT EasyClean Taper is the most advanced and enhanced drywall taping tool offered by TapeTech. EasyClean lid releases with a quick turn of the single attachment screw, and makes clean-up and cable changes easier than ever. You can expect great TapeTech quality from the rest of the drywall gun as well!

The product is 9" 6TPI Reciprocate Blade
Frequently Asked Questions
How Long Does It Take Before I Can Gift or Sell My Homemade Candles?
I’d recommend waiting at least 24-48 hours for proper curing time before gifting your candles. However, if you’re selling them, I’d suggest doing thorough safety testing first to guarantee quality and performance.
Can I Reuse Leftover Wax From Failed Batches for New Candles?
Yes, you can reuse leftover wax, though 90% of candle makers don’t optimize this. I’d recommend recoloring wax and experimenting with scent blending to create unique batches from your failed attempts.
What’s the Difference Between Fragrance Oils and Essential Oils for Candles?
Fragrance oils last longer in candles with better scent throw, while essential oils offer natural options but burn off faster. I’d recommend fragrance oils for beginners since they’re specifically formulated for candle safety and performance.
How Do I Know Which Wick Size Is Correct for My Jar?
I’ve burned a million candles to figure this out. Match your wick size to your jar diameter—thicker jars need thicker wicks. I’d recommend testing burns and trimming wicks to ¼ inch for peak performance.
Why Did My Candle Develop a Sinkhole in the Center While Cooling?
Your sinkhole happened because air pockets formed as your wax cooled and shrank around the wick. I’d recommend pouring a second layer of reheated wax to smooth out that center depression.
Conclusion
Look, you’re ready. You’ve got your supplies lined up, your wick sized right, and your wax melting at the perfect temperature. Remember: you can’t rush good candles. I’ve torched plenty of batches trying to speed things along, and they turned out mediocre. Give yourself grace—your next pour will be better than this one. You’re already thinking like a candle maker.